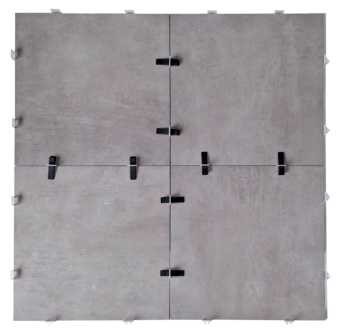
For detailed information, other images and documents, please select individual articles from the following table.
Levelling spacer for tiles W-LEVEL
Quick and practical tile levelling system, ensures level laying and even spacing
Register now and access more than 125,000 products
Variants
Register now and access more than 125,000 products
- W-LEVEL levelling spacer for level laying of tiles. The system allows the elements to be laid quickly and precisely, both horizontally and vertically, ensuring a planar surface and acting as a spacer to create precise and even spacing
- Compact product designed to provide stability and support when levelling and available for different joint widths
| Tile size [cm] | No. of pieces per m² |
| 30x60 | 22 |
| 30x90 | 19 |
| 40x40 | 25 |
| 40x60 | 17 |
| 40x80 | 16 |
| 45x45 | 20 |
| 45x60 | 15 |
| 45x80 | 14 |
| 50x50 | 16 |
| 50x100 | 12 |
| 50x120 | 10 |
| 50x120 | 11 |
| 60x60 | 10 |
| 60x80 | 10 |
| 60x100 | 8 |
| 60x120 | 9 |
| 80x80 | 9 |
| 80x100 | 7 |
| 80x120 | 7 |
| 90 x 90 | 6 |
| 90x120 | 8 |
| 100x120 | 7 |
| 120x120 | 6 |

Laying floor tiles
1. Positioning the levelling spacer:
After applying the cement-based adhesive, insert the base of the levelling spacer under each side of the tiles. Note: We recommend installing a specific number of spacers per square metre according to the tile size (see attached table). Once positioned, simply tap the tile with a rubber mallet; the two lugs on the spacer can be used to determine the joint width
2. Inserting the levelling wedge:
Insert the levelling wedge into the slot on the levelling spacer, taking care not to pass the break point
3. Aligning the tiles:
Use the levelling spacer pliers at this stage. Before use, it is important to turn the screw on the pliers to adjust the pressure for inserting the wedge, thereby preventing the wedge from being inserted further than necessary into the levelling spacer. This ensures correct levelling of the tiles and prevents the risk of breaking the levelling spacer
4. Removing the levelling spacer:
Once the adhesive has hardened, use a rubber mallet to strike the protruding part of the spacer in the direction parallel to the joint. The protruding part will break and can be discarded, while the levelling wedge can be retrieved for reuse
Select RAL-colour code
!! NOTE: On-screen visualisation of the colour differs from real colour shade!!


